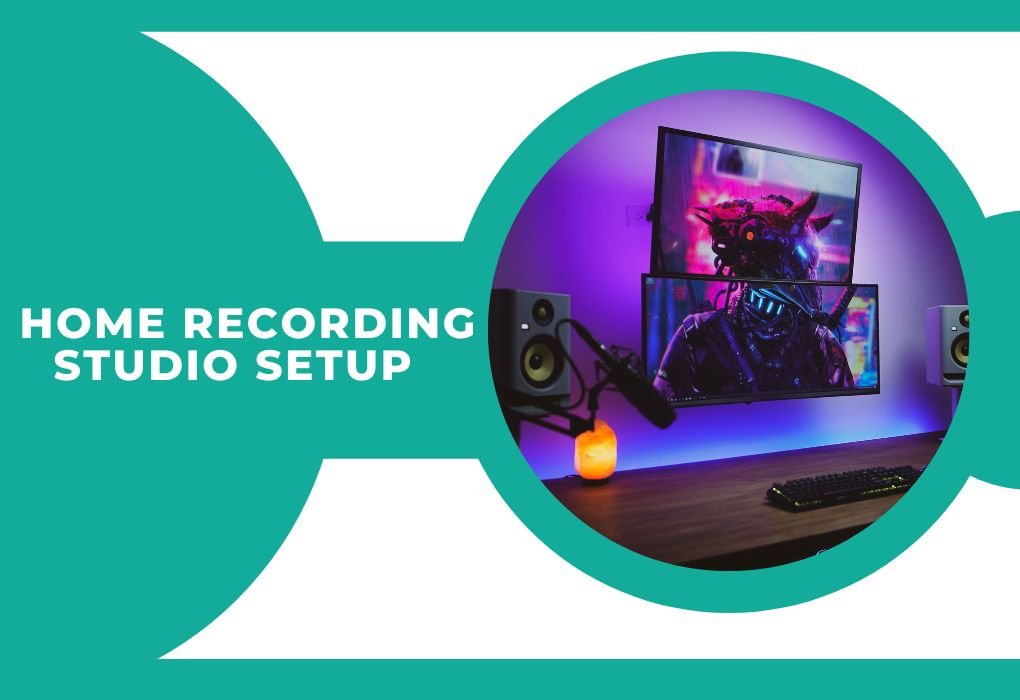
Embarking on the journey to set up your home recording studio can be a tuff task. The process is similar to assembling a jigsaw puzzle. you need all the right pieces in the correct places to create a complete picture. From choosing an appropriate space to picking the right equipment, there’s a lot to consider. But fear not, by the end of this guide, you will be well on your way to creating a fully-functional recording space right in your home. So, let’s dive in!
Pick a Space
First and foremost, the key to a great home studio is finding the perfect space. Much like finding the ideal spot for a tranquil reading nook, your recording space should be free from distractions and excessive noise. Bonus points if it’s a room you feel comfortable and creative in! Think of it like a wizard selecting their wand in the wizarding world, the room chooses you as much as you choose it.
Piece Together a PC
Next up, you’ll need a powerful PC. The heart of your home studio, a PC, is much like the conductor of an orchestra. It synchronizes all the different components of your studio. When choosing a PC, consider aspects like processing power, RAM, and storage capacity. Remember, on the advice of experts, you wouldn’t want to compromise here.
Choose an Audio Interface
Think of your audio interface as your studio’s ambassador to your PC. It translates audio signals into digital data your computer can understand and vice versa. When choosing one, ensure it has enough inputs and outputs to suit your needs.
Pair it with Studio Monitors

A good pair of studio monitors is like having a reliable set of taste buds in a master chef’s kitchen. They let you ‘taste’ your music by giving you an accurate reproduction of your audio. In other words, they let you hear your music as it is.
Digital Audio Workstation (DAW)
Choosing a DAW is crucial. The DAW you choose depends on your personal preference and the type of music you want to create. It’s the software you’ll use to record, edit, and mix your music.
Load the Microphones
A microphone is the first point of contact between your sound and your recording setup. It’s your studio’s ears. Depending on what you plan on recording (vocals, instruments, etc.), the type of microphone you’ll need may vary. Consider options like dynamic mics, condenser mics, or ribbon mics depending on your needs.
Headphones and Amplifier
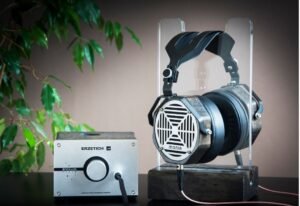
Invest in a pair of studio-grade headphones and an amplifier. These are crucial for detailed listening and for times when using studio monitors isn’t feasible. Think of these as your magnifying glass, allowing you to focus on minute details in your mix.
Get a MIDI Keyboard
A MIDI keyboard is the Swiss army knife of your studio setup, enabling you to play and record drum parts, piano lines, bass grooves, and more. It’s a one-stop solution to add a wide range of instruments to your tracks without needing to learn to play them all.
Round it up with Cables and Hardware
Just as veins and arteries connect our body’s systems, cables connect your studio. Be sure to have a variety of quality cables, including XLR, ¼ inch, and USB cables, as well as mic stands and pop filters.
Use a Walk-In Closet as a Recording Booth
If you have a walk-in closet, it can serve as a perfect improvised vocal booth. The clothes act as natural sound absorbers, reducing echo and background noise. It’s like your own personal sound oasis!
Soundproof Your Room
Soundproofing your room is as important as wearing noise-cancelling headphones in a bustling city. It helps to keep unwanted sounds out and your music in. You can soundproof your room with materials like mass-loaded vinyl, green glue, or soundproofing foam sometimes Eggs Trays are also used as Budget DIY soundproofing projects.
Choose a Desk and Desk Chair

A good desk and comfortable chair may not seem like significant elements in the grand scheme of your home studio setup but think of them as the bedrock on which your studio stands. An ergonomic chair can save you from discomfort during long sessions, and a sturdy desk provides the foundation for your gear.
Acoustic Treatment
Just as a painter primes a canvas to get the best colour representation, acoustic treatment ‘primes’ your room for the best sound. This process involves strategically placing elements like diffusers and bass traps to manage sound reflections and control resonances.
Cables
High-quality cables are the unsung heroes of any studio setup. Much like the nervous system in our body, they ensure seamless communication between different components of your setup. Make sure you have a sufficient amount and variety of cables, including XLR, 1/4″ TRS, and RCA.
Rack Case
A rack case is a home for your outboard gear. It helps to keep your space organized and your gear safe. Consider it as your recording gear’s own personal suite!
Monitor Stands

Monitor stands serve a dual purpose: they help you position your studio monitors for the best possible sound and they keep your working area clean and tidy. Think of them as your personal sound stylists!
Acoustic Foams and Panels for Acoustic Treatment
Acoustic foams and panels are essential for acoustic treatment. They help reduce echoes and absorb unwanted frequencies.
External Hard Drives
An external hard drive is like your studio’s memory bank. It provides extra storage space and helps you keep backup copies of your projects, ensuring you never lose a precious piece of your work.
Budget Home Studios: How cheap is cheap?
Creating a home studio doesn’t necessarily mean emptying your bank account. Think of it as a journey rather than a one-time shopping spree. Start small and add pieces as you go. A modest setup with essential equipment like a decent PC, microphone, headphones, and a DAW can be achieved on a budget. Remember, it’s not about the cost of the tools; it’s about how you use them!
Also, check : BEDPHONES: A Comprehensive Review and Guide
Final Thoughts on Home Recording Studio Setup
Setting up a home recording studio is an adventure that combines passion, creativity, and a bit of technical know-how. Like putting together a gourmet meal, it requires a careful selection of ingredients and meticulous preparation.
But the satisfaction of creating your own music in a space designed by you is unmatched. With patience, research, and a dash of investment, you can cook up your musical paradise!
FAQs :
What’s the most important piece of equipment in a home studio?
There’s no definitive answer to this as it largely depends on your specific needs and the type of music you intend to create. However, every home studio should have a reliable computer, a good-quality audio interface, and a pair of studio monitors or headphones.
Can I set up a home studio on a budget?
Absolutely! It’s possible to start with basic equipment and gradually add more as your needs grow. Remember, it’s not the gear that makes great music; it’s the person using it!
Is room treatment necessary for a home studio?
Room treatment can greatly improve the sound quality in your home studio. It can help control echoes and manage sound reflections, which can lead to a more accurate sound.
Which DAW is best for beginners?
There are many great DAWs out there for beginners. Some popular choices include GarageBand (free with Mac), Reaper, and Ableton Live. The best one for you depends on your personal needs and preferences.
Do I need a MIDI keyboard for my home studio?
While not a necessity, a MIDI keyboard can be a great addition to your home studio, especially if you intend to record a lot of instruments or create electronic music. It allows you to input notes into your DAW and can be a big time-saver.
Can I use my walk-in closet as a recording booth?
Yes, a walk-in closet can make an excellent makeshift recording booth. The clothes help absorb sound and reduce echo, which can lead to cleaner recordings.
Is it important to soundproof my home studio?
Soundproofing can prevent outside noises from entering your studio and keep your music from disturbing others. It can also help control sound within the room. While not always necessary, it can certainly improve the overall sound of your recordings.
Remember, every recording studio will have a unique setup based on the individual’s needs and preferences. There’s no “one-size-fits-all” approach. Enjoy the process, and happy recording!
Let’s dive into conclusion.
Conclusion :
In conclusion, creating a home studio is a labor of love that can give your musical journey a whole new direction. Like a home chef perfecting their signature dish, it takes time and practice to get everything just right. But once you do
There’s no limit to the sonic masterpieces you can create!